
Install tracking
Install on a custom HTML site
Install the tracking code on any custom built website.
Use this guide if your store runs on a custom built website or a platform we don't have a dedicated integration for. If you use Shopify, WooCommerce, BigCommerce or Magento, follow the guide for that platform instead.
The installation has two parts: the tracking code, which goes on every page and records visits, and revenue tracking, which goes on your order confirmation page and records orders and customers. You need both for ThoughtMetric to attribute sales to your marketing.
Install the tracking code
The first part of the installation is to install the ThoughtMetric tracking code on every page of your website, including all of your landing pages.
-
Create a ThoughtMetric account
Go to the ThoughtMetric sign-up page and sign up.
-
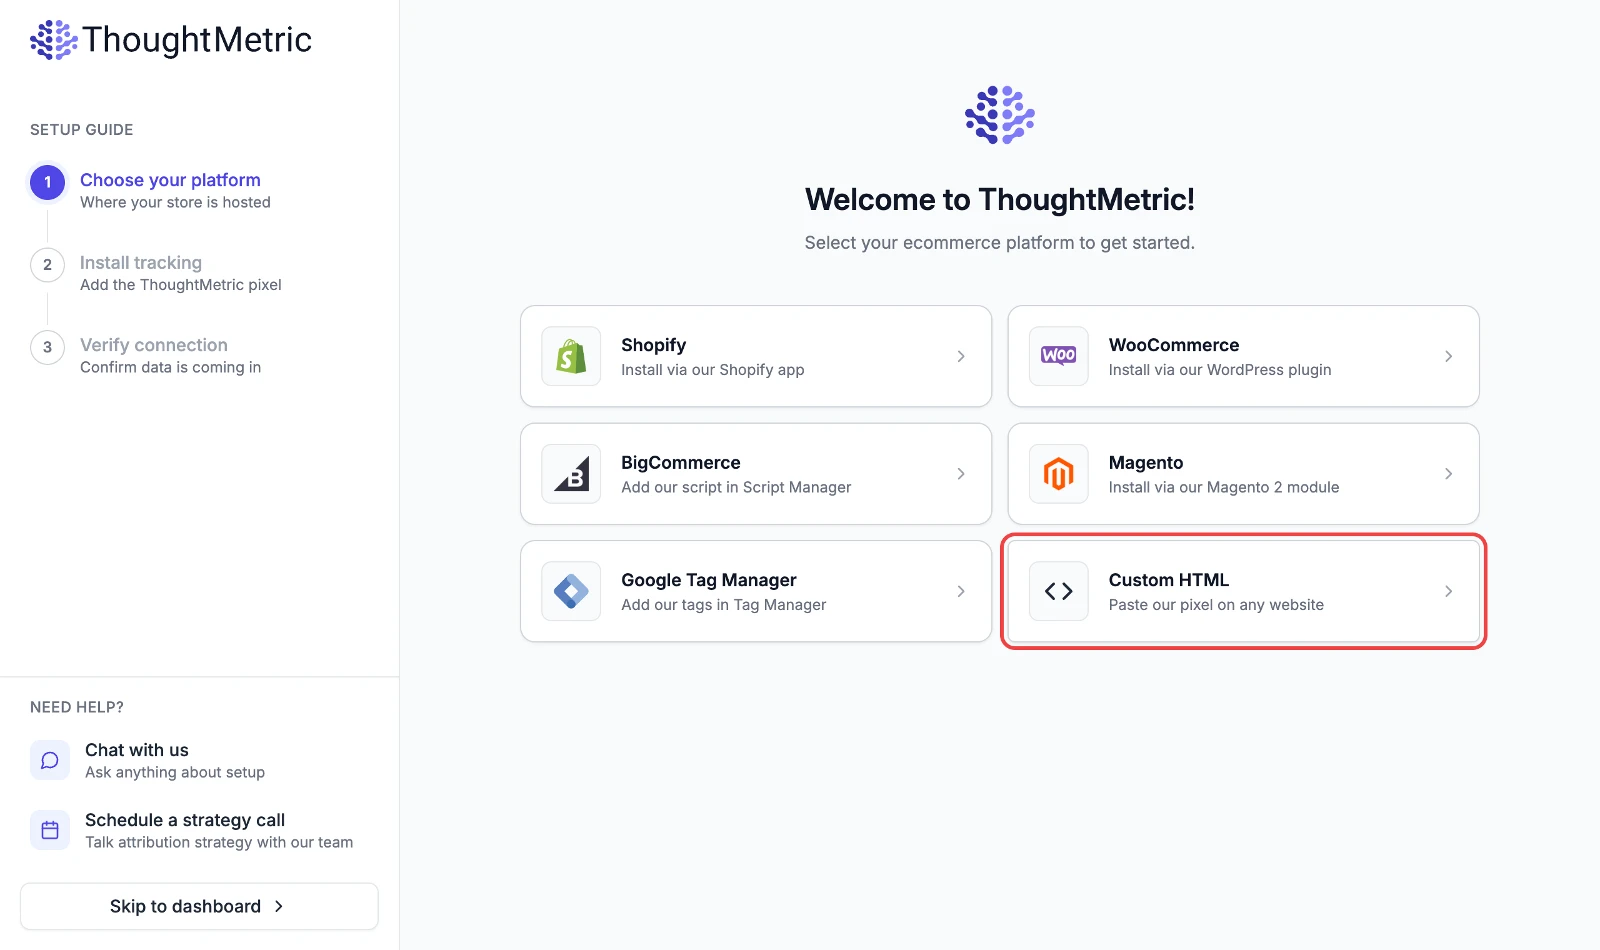
Select the Custom HTML platform
After you sign up, you are directed to an onboarding guide. Click Custom HTML to view the installation instructions for that platform.
-
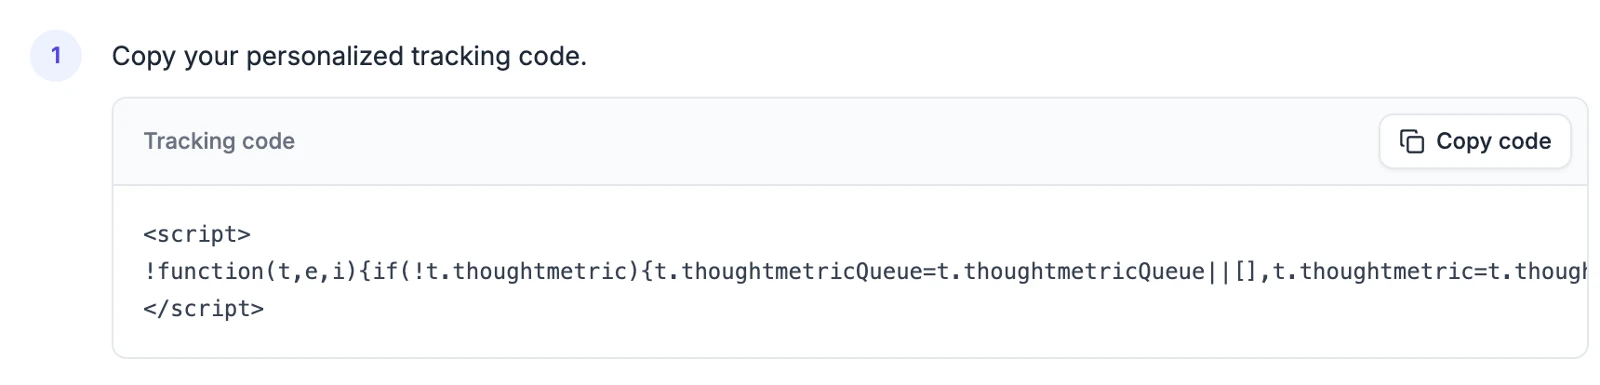
Copy the tracking code
Copy your personalized tracking code. It already contains the ID for your store.
-
Paste the tracking code into your site header
Paste ThoughtMetric's tracking code in the header of your website, just above the closing
</head>element, on every page of your website.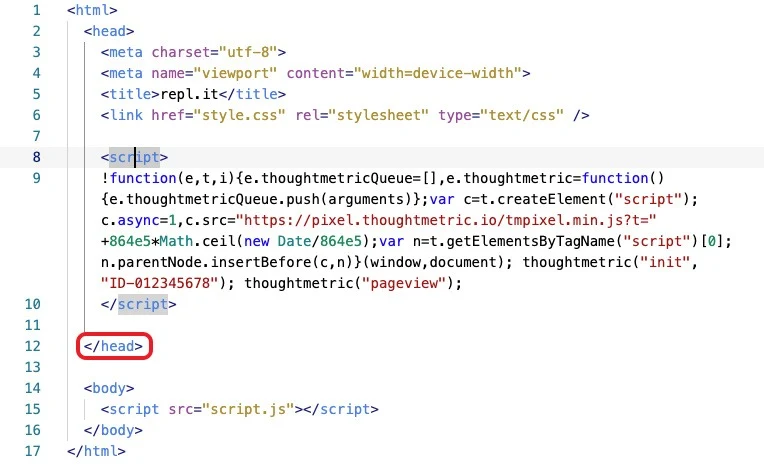
If you need help, reach out to the ThoughtMetric team and we will help you install the pixel.
Connect revenue tracking
The tracking code on its own only records page views. To record sales, your site needs to tell ThoughtMetric about each completed order and the customer who placed it. You do this with two JavaScript calls on your order confirmation (thank you) page:
Both calls go on the page a customer sees right after a successful purchase. That page must also have the tracking code from the first part of this guide in its header.
-
Add the order event
Add this script to your order confirmation page. These four fields are the minimum ThoughtMetric needs to record an order:
<script> thoughtmetric('event', 'order', { transaction_id: 'ORDER_ID', total_price: ORDER_TOTAL, currency: 'USD', orderCurrency: 'USD' }); </script> -
Add the customer identify call
Add this script to the same page, after the order event. The first argument is your unique ID for the customer, and
emailis the only required property:<script> thoughtmetric('identify', 'CUSTOMER_ID', { email: 'CUSTOMER_EMAIL' }); </script> -
Fill in the variables with real order data
The values in capitals are placeholders. Your site has to replace them with the details of the actual order each time the page loads, using whatever your site is built with (your server-side template, your checkout platform's template variables, or JavaScript that reads the order from the page).
Placeholder Replace with Example ORDER_IDYour unique ID for this order, as a string '10482'ORDER_TOTALThe total value of the order, as a number with no currency symbol or quotes 55.00currencyThe base currency your store is configured to use 'USD'orderCurrencyThe currency this order was placed in 'GBP'CUSTOMER_IDYour unique ID for the customer. If you don't have one, use their email address. '0001'CUSTOMER_EMAILThe customer's email address 'john@snow.com'Once the placeholders are filled in, the code your customer's browser receives should look like this:
<script> thoughtmetric('event', 'order', { transaction_id: '10482', total_price: 55.00, currency: 'USD', orderCurrency: 'USD' }); thoughtmetric('identify', '0001', { email: 'john@snow.com' }); </script> -
Send more detail (recommended)
The more you send, the more ThoughtMetric can report on. Add the subtotal, tax, shipping, discounts and line items to the order, and the customer's order count and total spend to the identify call.
<script>
thoughtmetric('event', 'order', {
  transaction_id: '10482',
  total_price: 55.00,
  currency: 'USD',
  orderCurrency: 'USD',
  subtotal_price: 49.00,
  total_tax: 1.00,
  total_shipping: 5.00,
  total_discounts: 0.00,
  discount_codes: ['discount1'],
  items: [{ product_name: 'Shoes', variant: 'red', sku: 'shoe-red', discounts: 0, quantity: 1, unit_price: 49.00 }]
});

thoughtmetric('identify', '0001', {
  email: 'john@snow.com',
  created_at: '2022-09-06 20:12:44 -0400',
  total_spent: 55.00,
  orders_count: 1,
  first_name: 'John',
  last_name: 'Snow'
});
</script>
See the event reference and identify reference for every supported field.
ThoughtMetric uses transaction_id to tell orders apart, so each order must have its own unique ID. If a customer reloads the confirmation page, the same transaction_id is sent again and the order is not counted twice.
Track other events
The same event call can also record add to carts, leads and views of important pages. These are optional, and go wherever the action happens on your site rather than on the confirmation page. For example, call this when a customer clicks your add to cart button:
thoughtmetric('event', 'addToCart', {
  total_price: 55.00,
  currency: 'USD',
  orderCurrency: 'USD'
});
Verify the installation
Go back to the ThoughtMetric onboarding guide and continue to the final step, where ThoughtMetric checks that it is receiving data from your site. To speed this up, open your website and refresh the page a few times. Then place a test order and confirm it shows up in your ThoughtMetric dashboard.
Add the post-purchase survey
You can collect additional attribution data directly from your customers with ThoughtMetric's post-purchase "How did you hear about us?" survey, shown on your order confirmation page. See Add the survey to a custom site to set it up.